Create your first presentation
Create one poll, join from your phone, and review your first session's results.
1. Get ready
If you do not have an account, start on the sign-up page. You can also select Start for free at the bottom of a blog post. The sign-up page keeps the language you were using; use its language selector to choose another language.
You can reopen this guide at any time from Guides in the top or bottom menu of the SlideQ home page, blog, and legal pages. The Korean interface opens the Korean guide; every other language opens the English guide. Blog in the same menus has articles on interactive presenting.
You need a presenter account and an internet-connected browser. Keep a phone nearby to try the participant experience. Participants do not need to sign in with a presenter account, although your presentation may require email verification.
This guide uses a single poll with answer options. If you already have a PPTX, PPT, or PDF, see Import a file.
2. Create a presentation in your workspace
- Sign in and open your workspace.
- Select New presentation. The editor opens once the presentation is created.
- Enter a recognizable name in the presentation name field at the top. Click outside the field or press Enter to save the name.
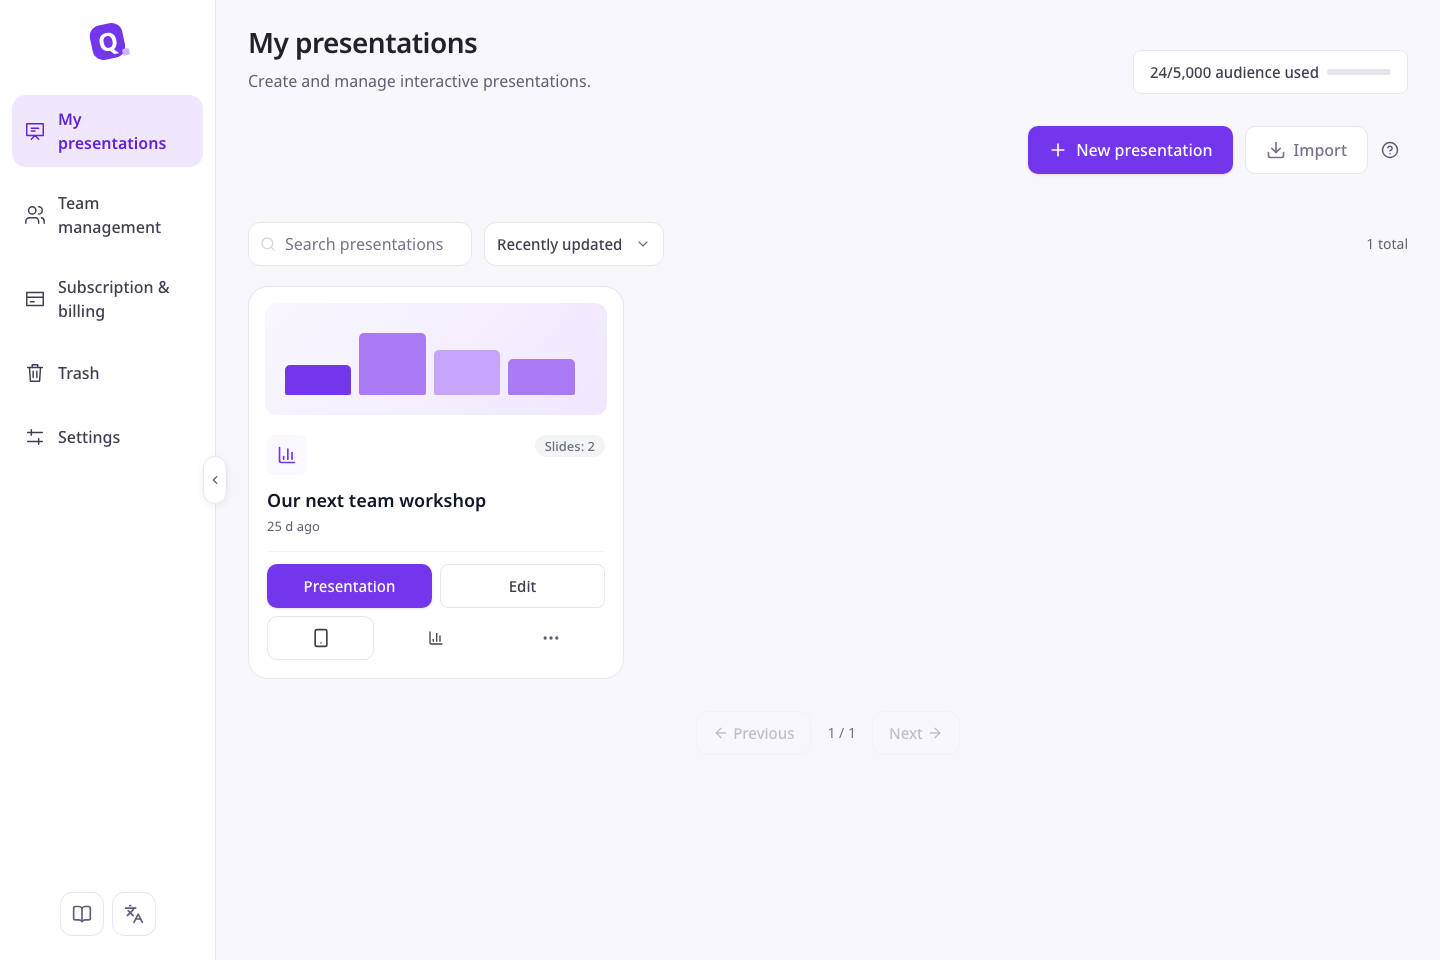
Use the creation and import buttons to prepare content. Open existing content from the presentation list below. If a creation limit appears, review the access conditions shown on screen.
Presentations appear in pages of up to 20 items. Use Previous and Next below the list; both are disabled when there is only one page. Changing the search or sort returns to page one. Open Guides using the book icon at the bottom left, or the book icon in the mobile header.
3. Add a poll slide
- Select New slide on the left of the editor.
- Find the poll in the slide type picker. You can search or filter for interactive slides.
- Select the type. The new slide appears immediately after the selected slide.
On a small screen, use the slide list, canvas, and content/settings tabs to switch editing areas. See Edit slides for more detail.
4. Write the question and options
Select the new slide and fill in its question and options in the settings area. For example, ask “Which topic interests you most?” and provide distinct topics as options.
Use Add option for additional choices. Leave Allow multiple choices off for a first poll so participants choose one answer. If you enable it, also check the maximum number of choices.
5. Check saving and preview the slide
Slide edits save automatically. Check the save status at the top, then select Preview to inspect the presentation and participant views. On a small screen, buttons switch between the two preview views.
Preview answers and live answers are different
Answers submitted in the editor's participant preview stay within that preview. Selecting Present and submitting through the real join link records answers in a presentation session.
If saving fails, select Save again. If a conflict appears, preserve the content you need before following save conflict recovery.
6. Join from your phone
- Select Present at the top of the editor. It finishes saving, opens the presentation view, and starts a session or resumes an active one.
- Click the QR code or press Q to enlarge it.
- Scan it on your phone, enter Your name, pick an avatar, and select Join. Complete email verification first if prompted.
- On the presenter's poll slide, select Open responses.
- On your phone, choose an option and select Submit answer. Check the sent confirmation.
Joining alone does not open responses. If the phone is waiting for responses to open, check the presenter controls.
7. Show results and finish
Select Show results on the presenter screen to stop collecting new answers and display results. Use Reopen if you want to accept answers from participants who have not answered. This does not reset submitted poll answers.
When finished, select End and confirm with End presentation. You move to that session's report. Note the test session's time so you can distinguish it from a later event.
8. Troubleshoot your first run
| Problem | What to check |
|---|---|
| A slide is not added | Review any slide-count or slide-type access message. If creation failed, try again in the type picker. |
| The phone says the presentation has not started | Make sure you opened the actual presentation, rather than only the editor preview. |
| The submit button is unavailable | Check that you selected an option, responses are open, and you have not already submitted. |
| The editor does not navigate after saving | Resolve the save error or conflict, then select Present again. |
| Results look unexpected | Select the correct test session in Reports. |
| A workspace screen keeps showing "Something went wrong" | Your sign-in may have expired, or you were signed out or changed your password on another device. Resetting your password ends sign-ins on all other devices right away. Reload the page: you are taken to the sign-in screen, where you can sign in again. If the connection was only briefly unstable, reloading lets you continue where you were. |
| Sign-in or sign-up shows "SlideQ is invite-only right now" | SlideQ is currently open only to invited accounts. Sign in, or use Google sign-in, with the email address that was invited. If you were not invited, please wait until sign-up opens. You can still join presentations run by invited presenters as a participant, without an account. |
Reopen the user guide
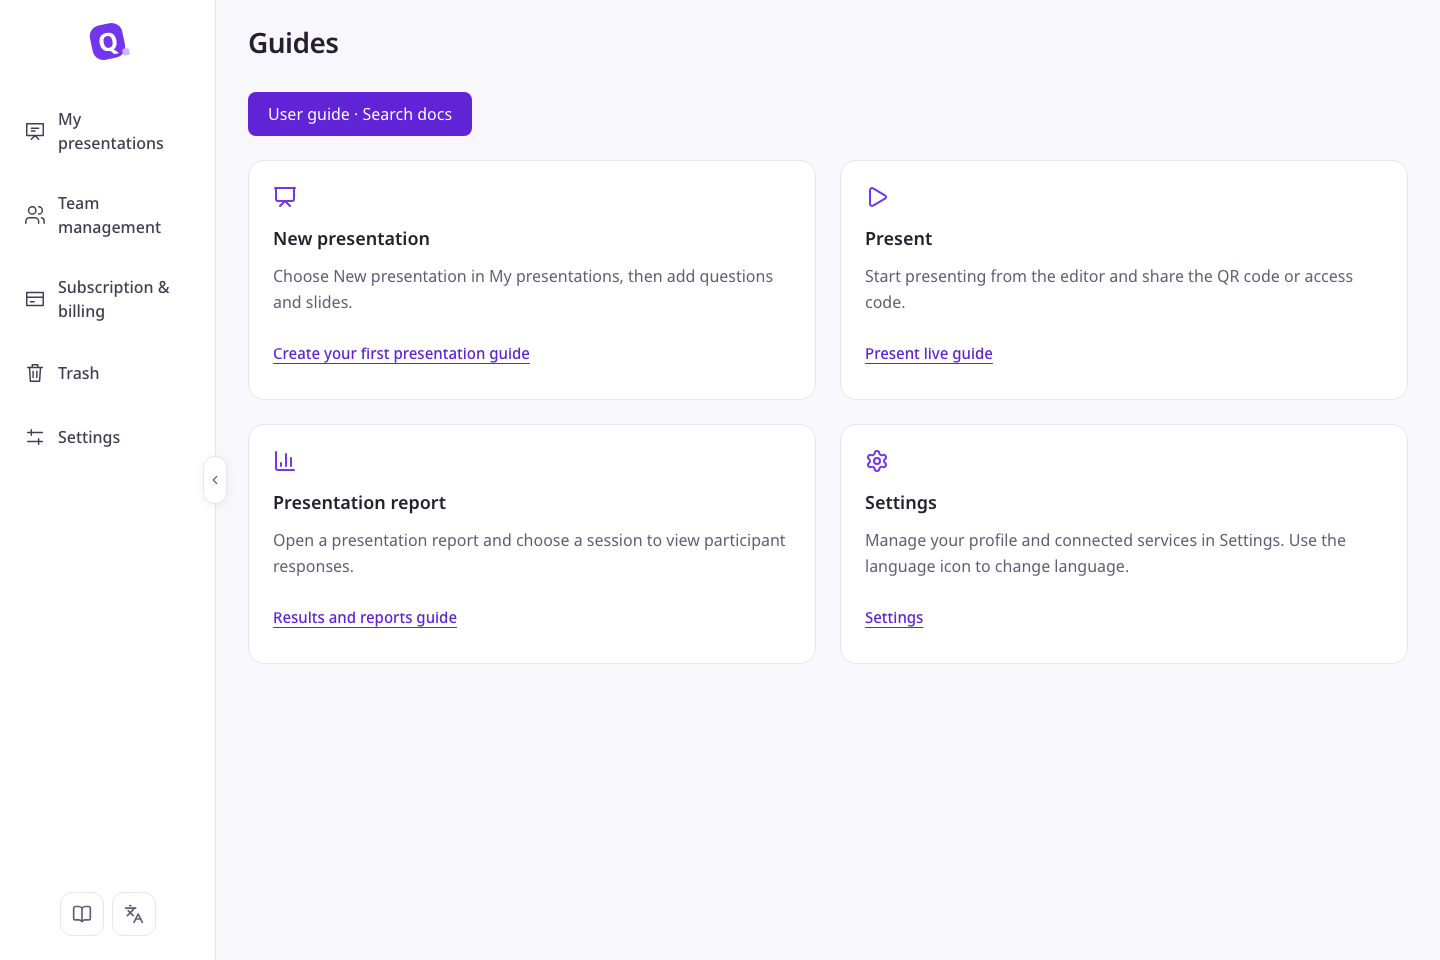
From Guides in the workspace, select User guide · Search docs to open this documentation. The button follows your interface language. The guide opens in Korean for a Korean interface and in English for all other interface languages.
The topic cards on the same page open the matching guide directly: Create your first presentation guide opens this page, Present live guide opens Present live, Results and reports guide opens Results and reports, and the Settings card goes to the workspace settings screen.
Delete a presentation and use the trash
A deleted presentation is not removed right away. It moves to the Trash, where you can restore it for 30 days.
- In My presentations, open More on the presentation card and choose Delete.
- In the confirmation, choose Move to trash. The presentation leaves the list when it is done.
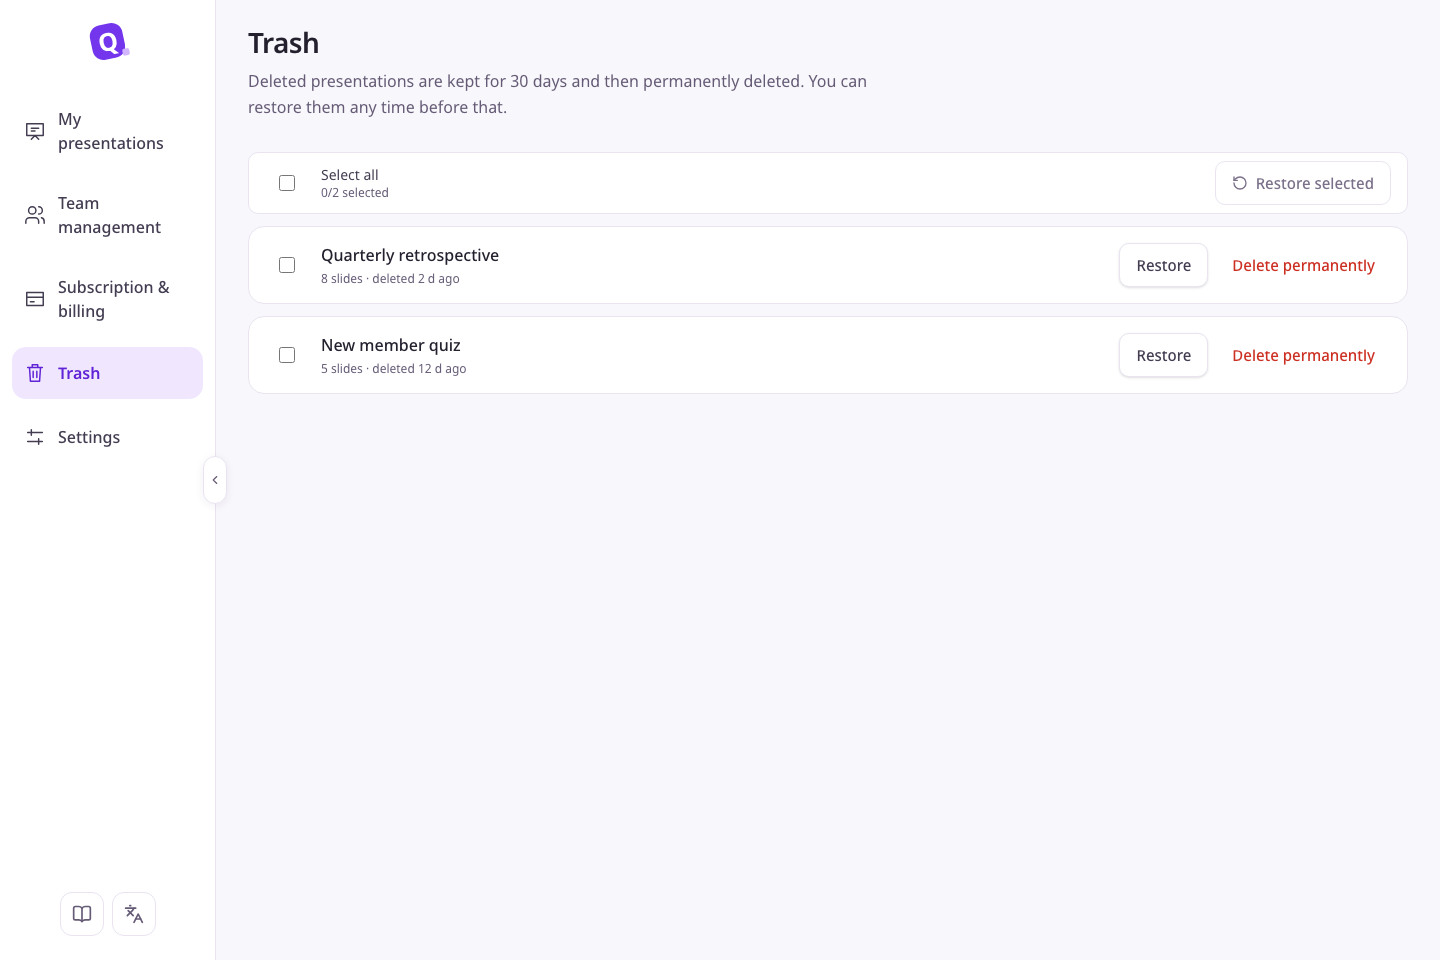
- Open Trash in the left menu to see deleted presentations and when they were deleted, for example
deleted 2 d ago. Choose Restore to bring one back. To restore several, check them and choose Restore N selected. - To delete one right away, choose Delete permanently and confirm with Delete permanently again. Its slides and responses are all removed and cannot be recovered.
Presentations that have been in the trash for more than 30 days are permanently deleted by a cleanup that runs once a day. They also no longer appear in the trash list. Restore a presentation or export its report before then if you still need it.
If you see Could not delete it, check whether the presentation is being presented. A live presentation cannot be deleted, so end it and try again. If restoring would exceed your presentation limit, an upgrade prompt appears. Move another presentation to the trash or change your plan, then restore again.
Request or cancel account deletion
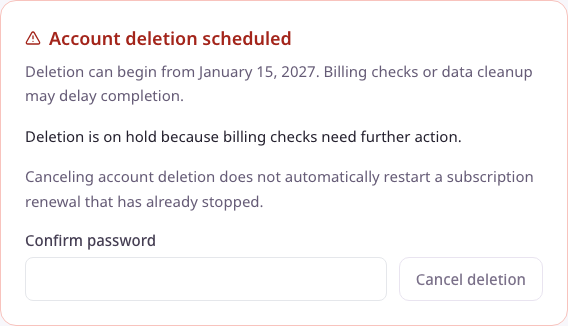
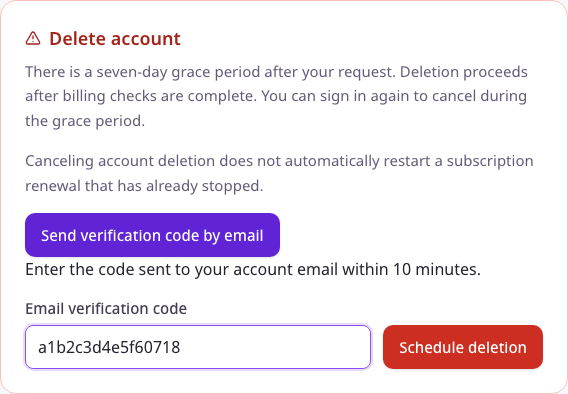
Request deletion under Settings → Profile → Delete account. Export any presentations and reports you need first. Password accounts use their current password. For a social account such as Google, select Send verification code by email and enter the 16-character code from your account email in Email verification code. An example format is a1b2c3d4e5f60718; use the code from your actual email.
- Enter your password or email verification code and select Schedule deletion.
- Review the notice and select Schedule deletion again. Once the request is accepted, you are signed out of the current screen.
- There is a seven-day grace period. If you sign in again during that period, you can still view your presentations and reports, but changes such as editing, presenting, and payments are blocked with Your account is scheduled for deletion. Request Cancel deletion in settings to use your account again right away. Social accounts need a new code specifically for cancellation.
- The displayed date is the earliest point deletion can begin, not a guaranteed completion date. Billing checks or data cleanup can delay completion.
Subscription renewal stopped does not mean data deletion is complete. If the screen says further action is needed, contact the support channel you currently use to check the status. Account and recovery information are not erased before billing checks are complete. Canceling account deletion does not automatically restart a subscription renewal that has already stopped.
If an input error or temporary failure appears, check your password or email verification code and try again. Cancellation may be refused after the grace period. Repeating the same deletion request does not extend its original request date.
A code expires after ten minutes and works once. If it is expired or incorrect, check the input or request another code. Wait one minute between requests. An email error does not mean the message was sent: retry later, check your account email and spam folder, and contact support if the problem continues.
Eligibility and terms before sign-up
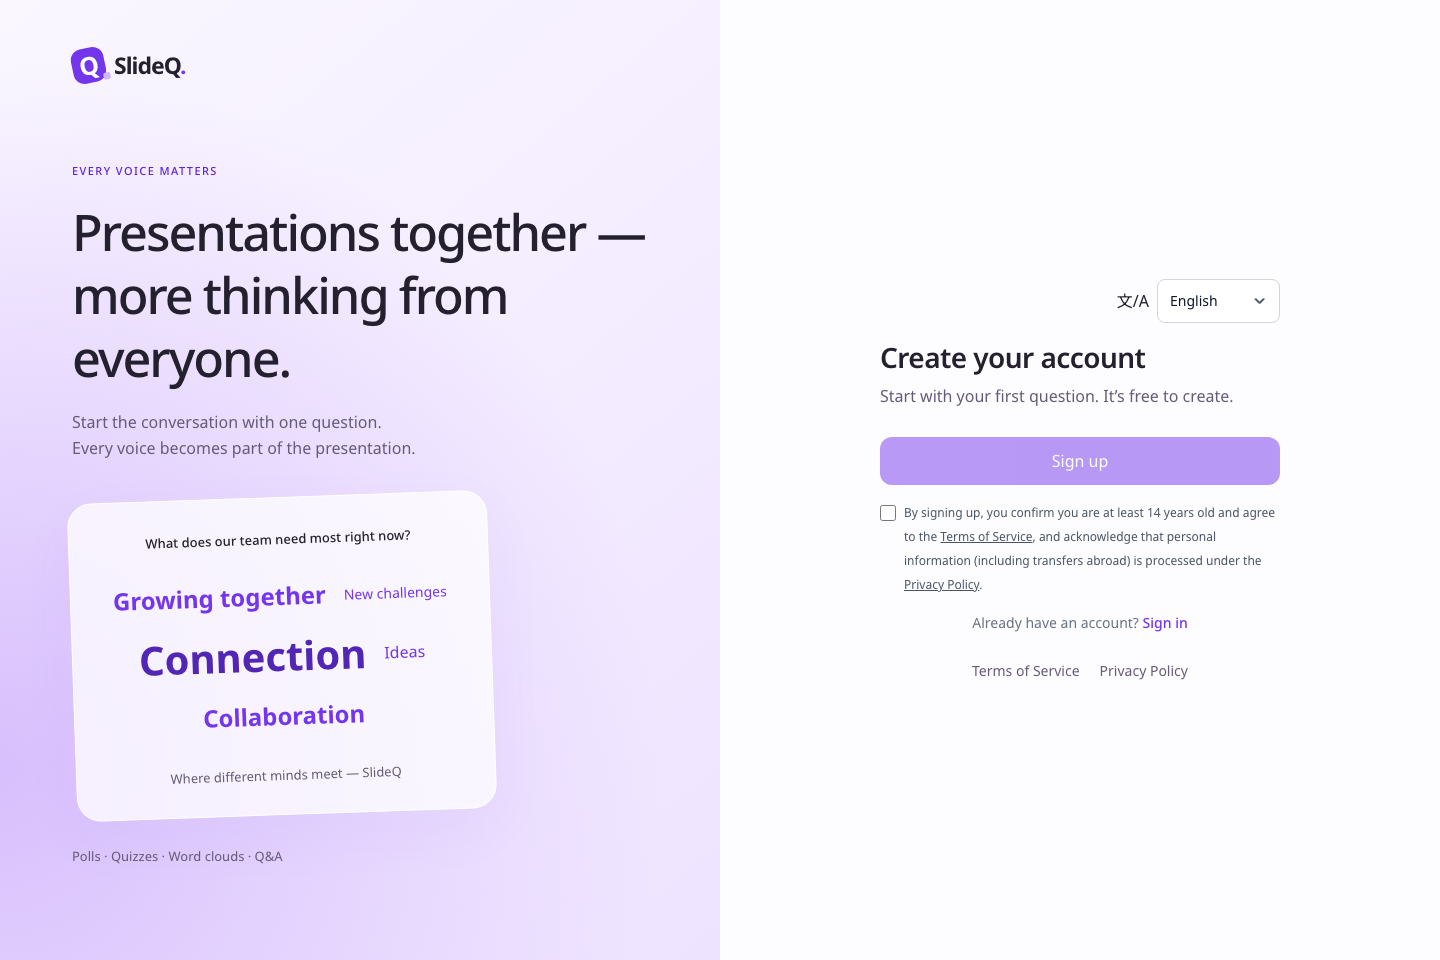
The initial service targets higher education, workplaces and adult events in the United States. Classes for K–12 students and use by children under 13 are outside the initial offering. Account holders must be at least 14, subject to higher applicable ages and authority to contract.
For email sign-up, complete the fields, review the Terms and Privacy Policy links, check the acceptance box and select Sign up. When connecting Google for the first time, review the terms on the returning sign-up screen, check the acceptance box and select Sign up to finish creating your account. Existing Google logins do not repeat that step. If the terms have changed, refresh, review them and try again. If Google verification expires, restart Google sign-in from the login screen.
Create a team and review its features
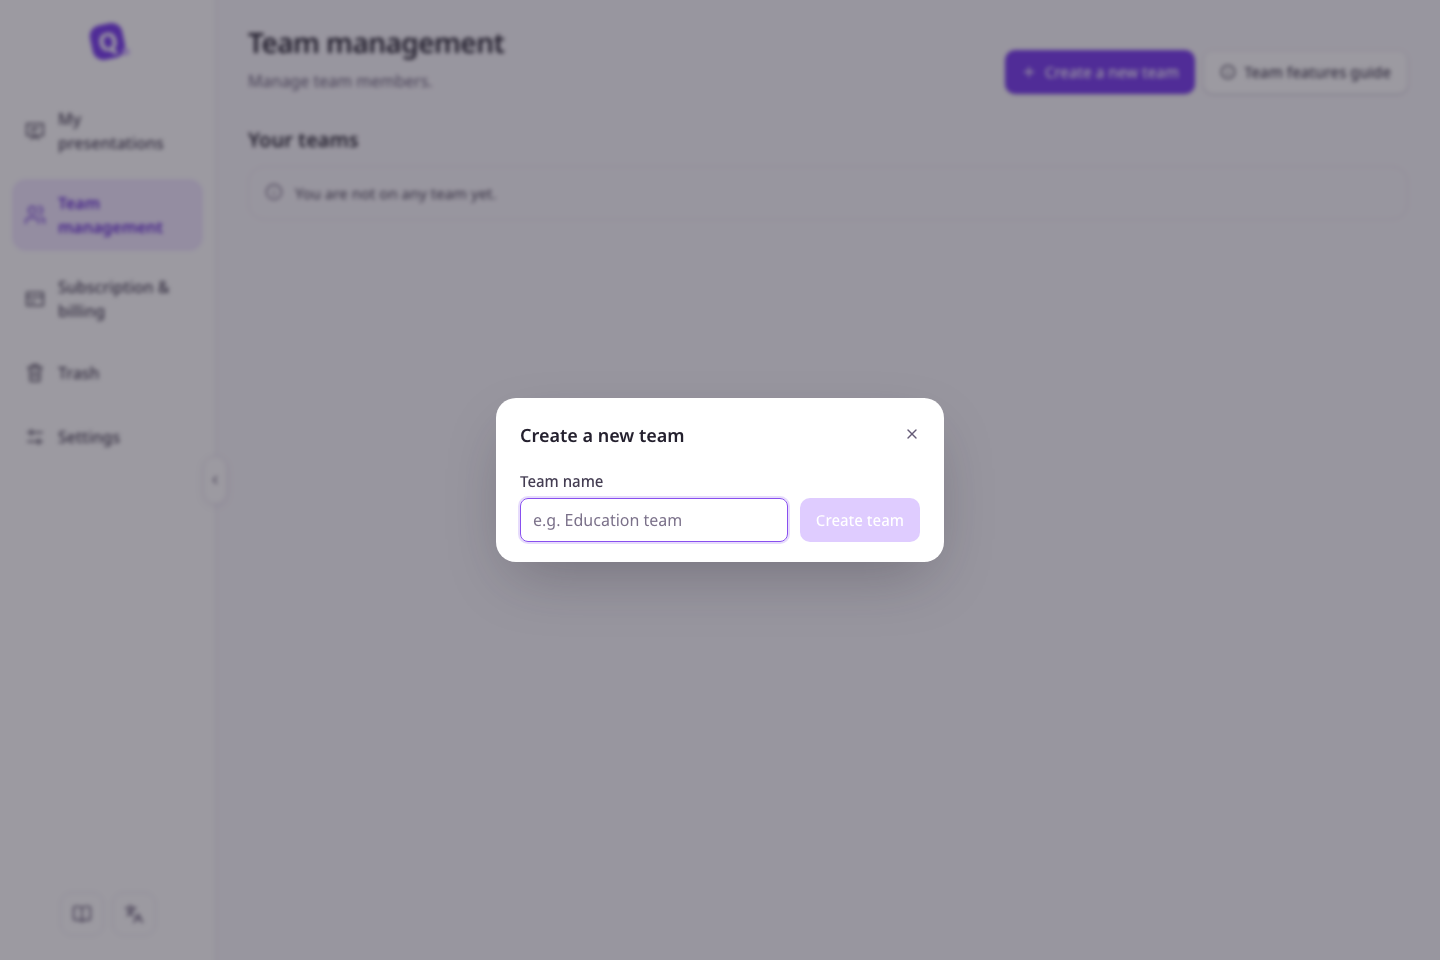
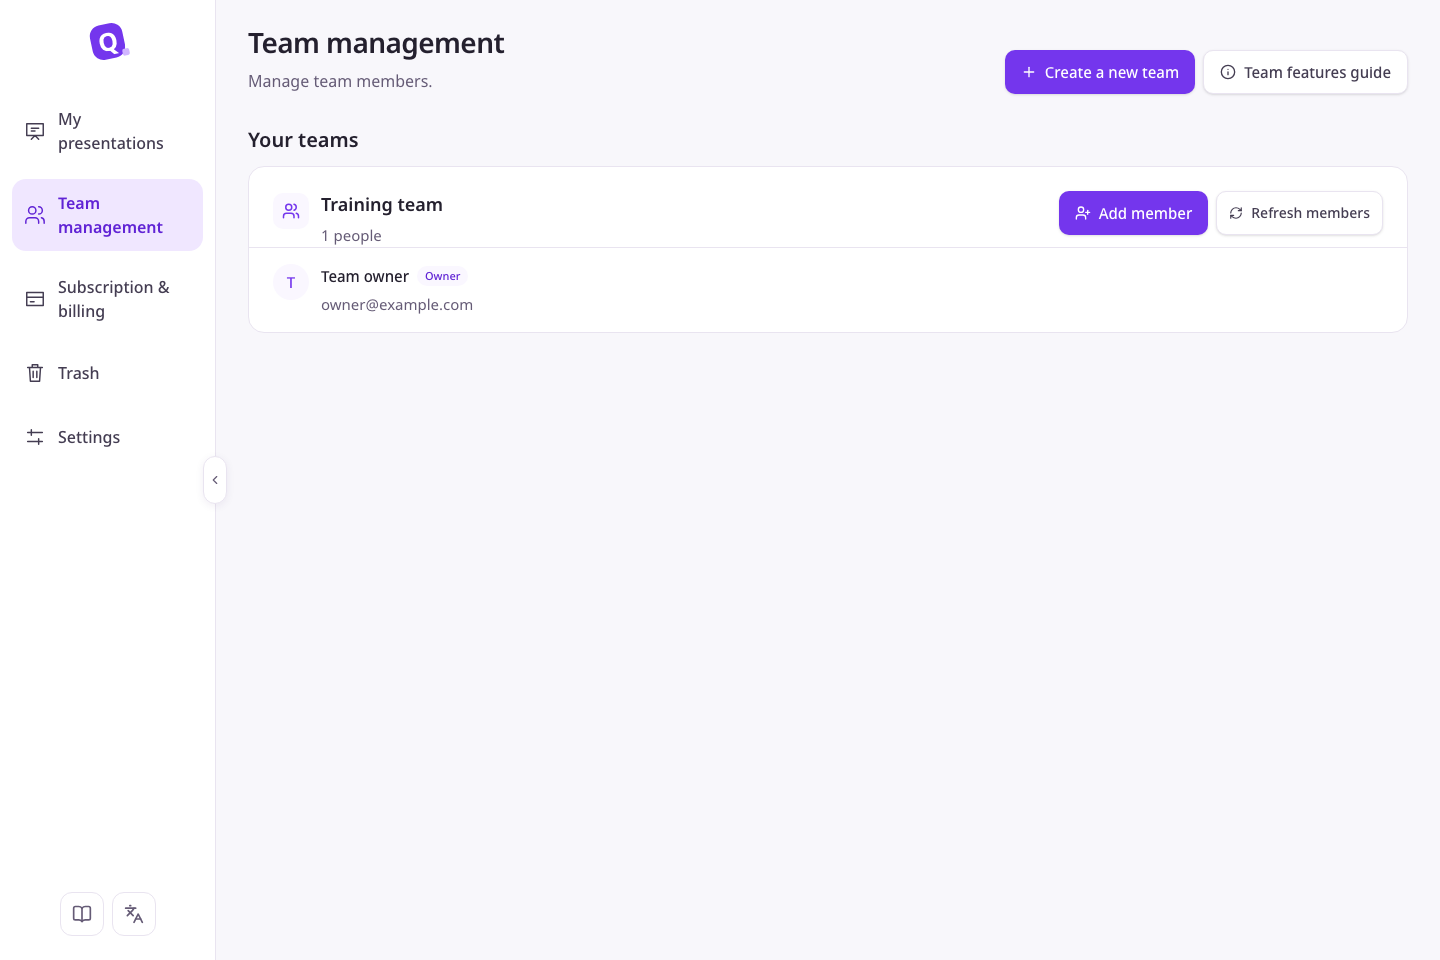
After signing in, open Team management and select Create a new team at the top. In the dialog, enter a recognizable team name, such as Training team, and select Create team. Once creation succeeds, the dialog closes and the new team's members appear. If an error appears, check the input and try again. If you see Check usage conditions, review your subscription's team access conditions first.
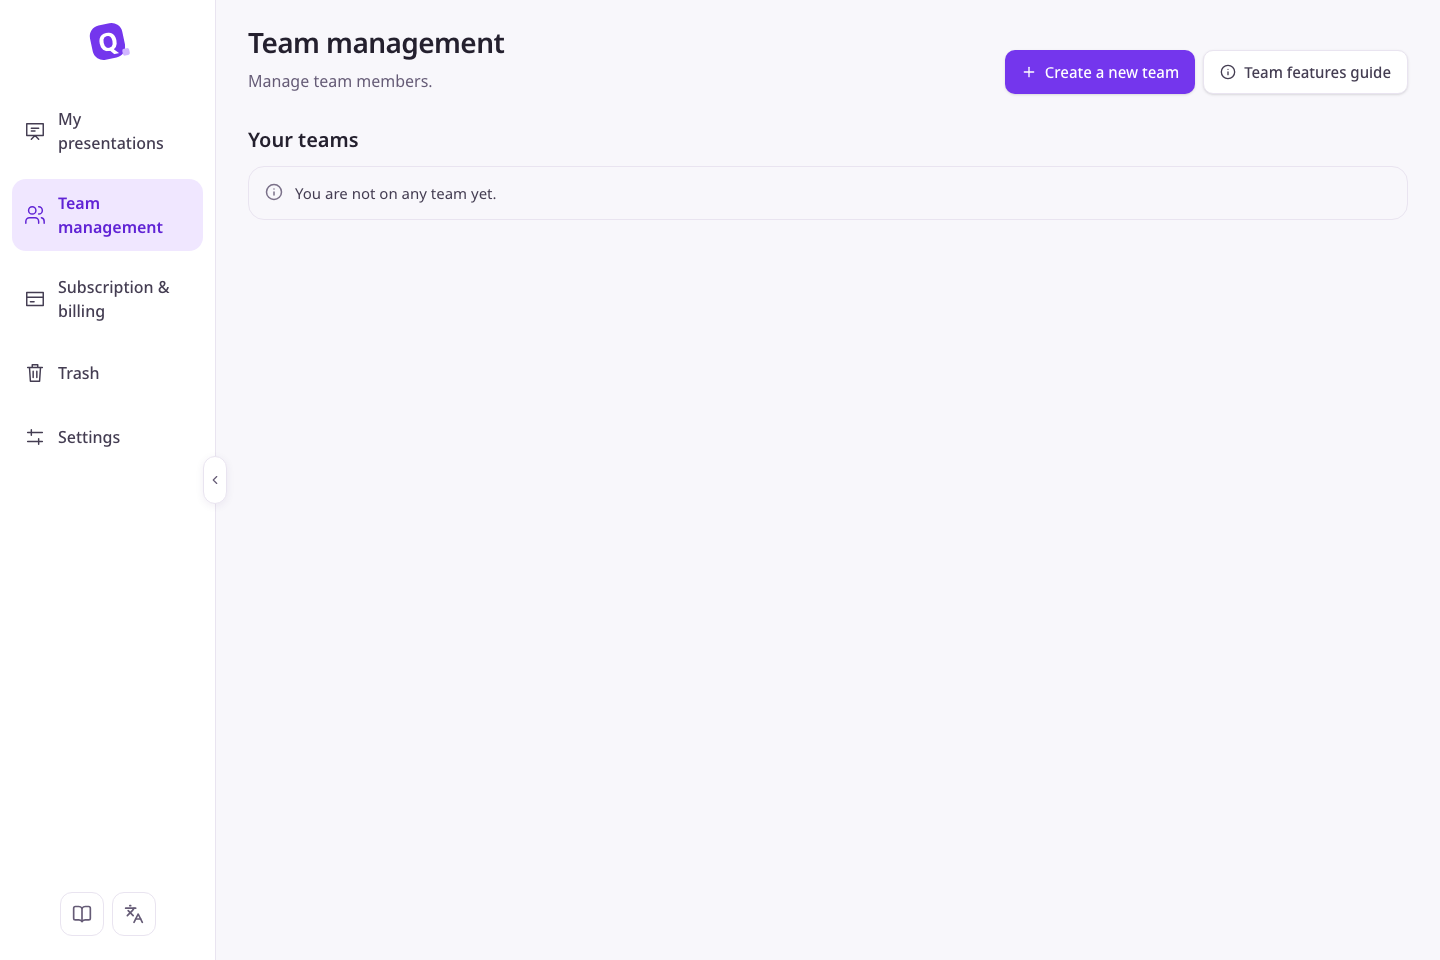
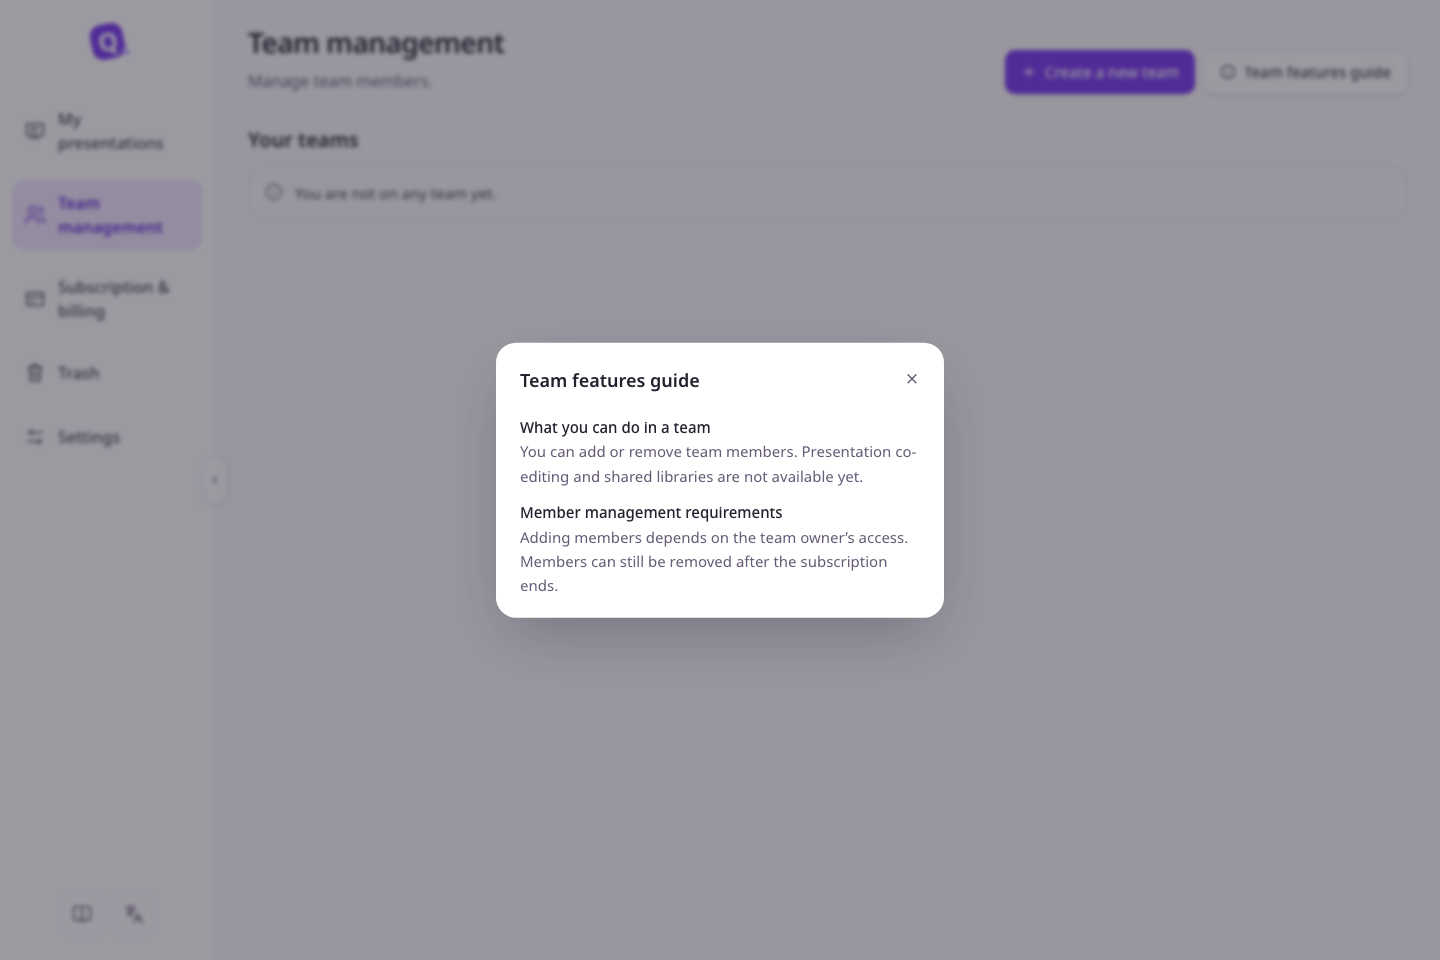
Select Team features guide beside Create a new team to open the information dialog. Review the available features and membership conditions, then close it using the close button or Escape to return to the list.
Add a team member
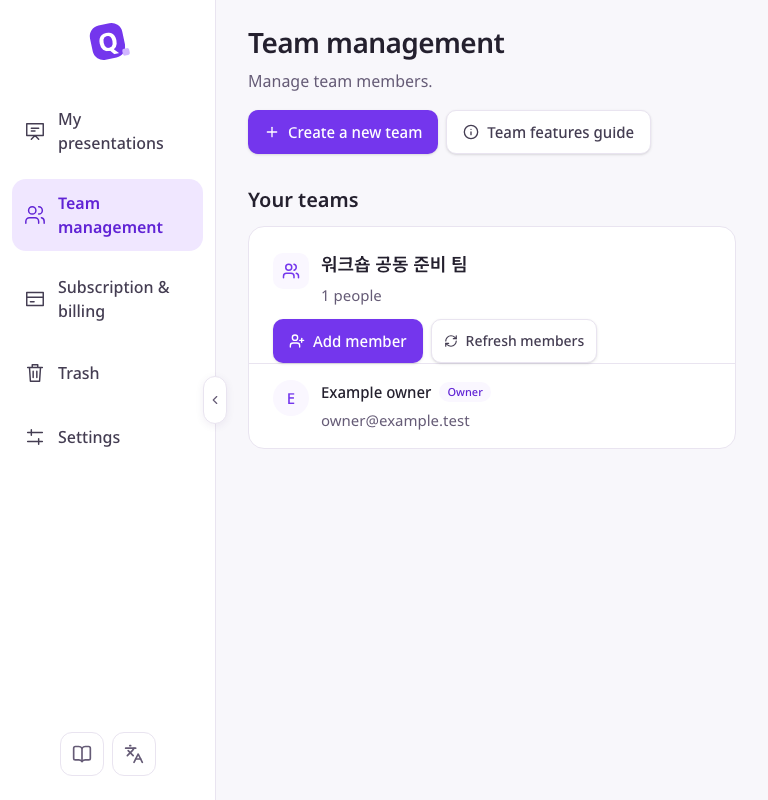
In a narrow team card, member controls appear below the team name. Check the team name before choosing an action.
Joining a team does not change a member's personal subscription or presentation access. To edit a presentation together, invite them as a collaborator using Share in that presentation's editor.
As the team owner, open Team management, select the team, and choose Add member on its card. In the dialog, enter an email already registered with SlideQ, such as member@example.com, and select Add member. Only accounts with a verified email can be added. If the request is rejected, ask the person to complete verification under Settings → Profile → Email verification, then add them again. Regular team members do not see this button.
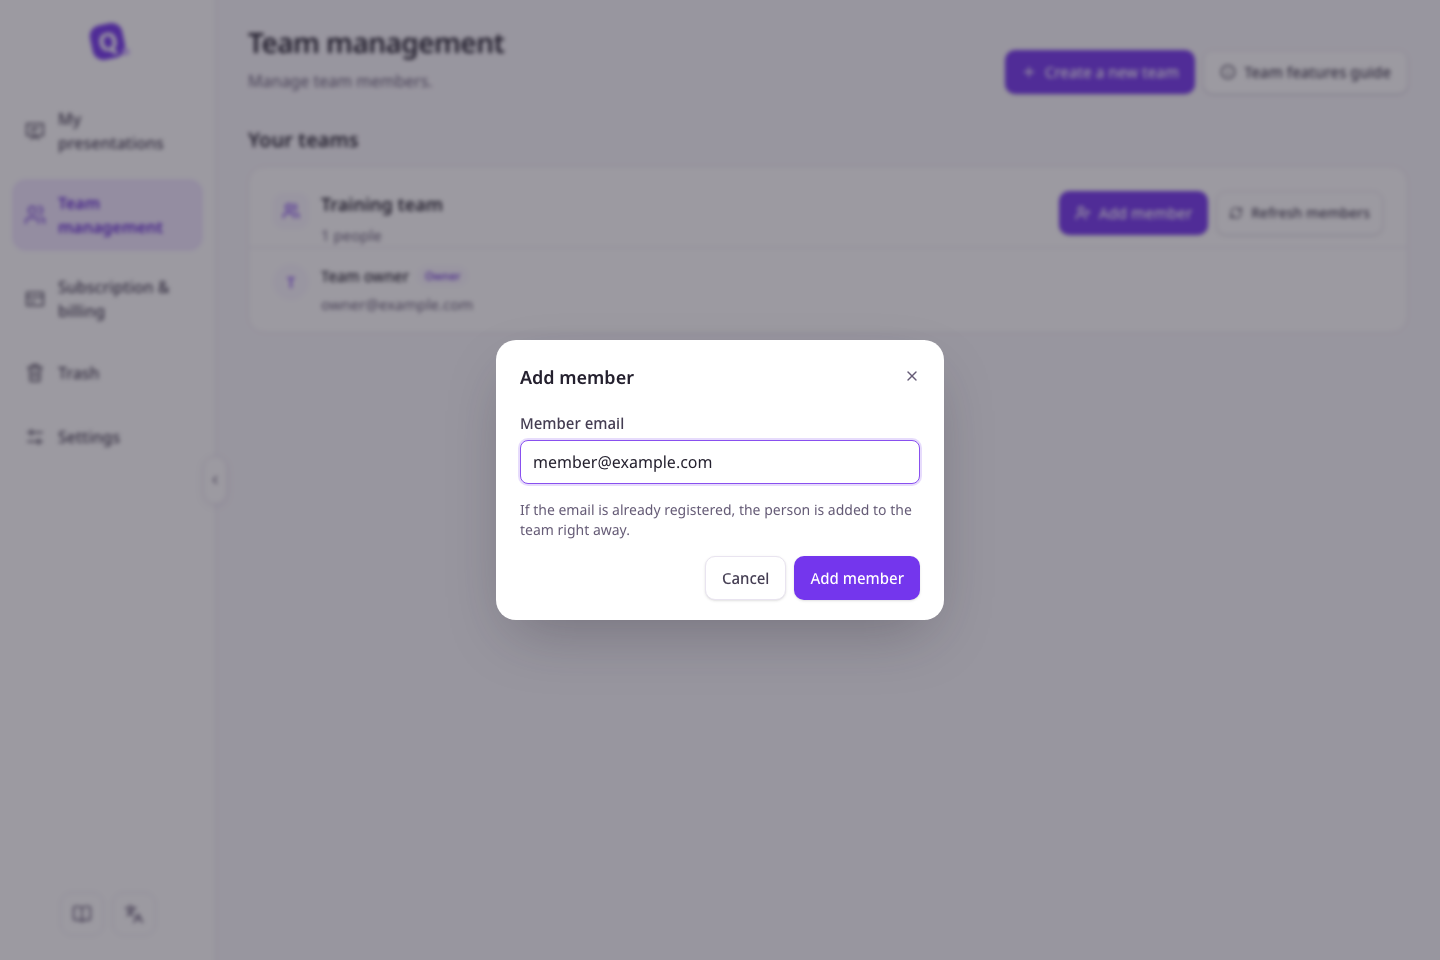
After success, the dialog closes and a confirmation appears with the refreshed list. If an error appears, check the email in the same dialog and retry; your inputs are preserved. Review any access guidance before proceeding. While submitting, editing and closing are temporarily disabled. Before submitting, use Cancel or Escape to close without adding anyone. Reopening starts with an empty email.
Applications and coupons in Settings
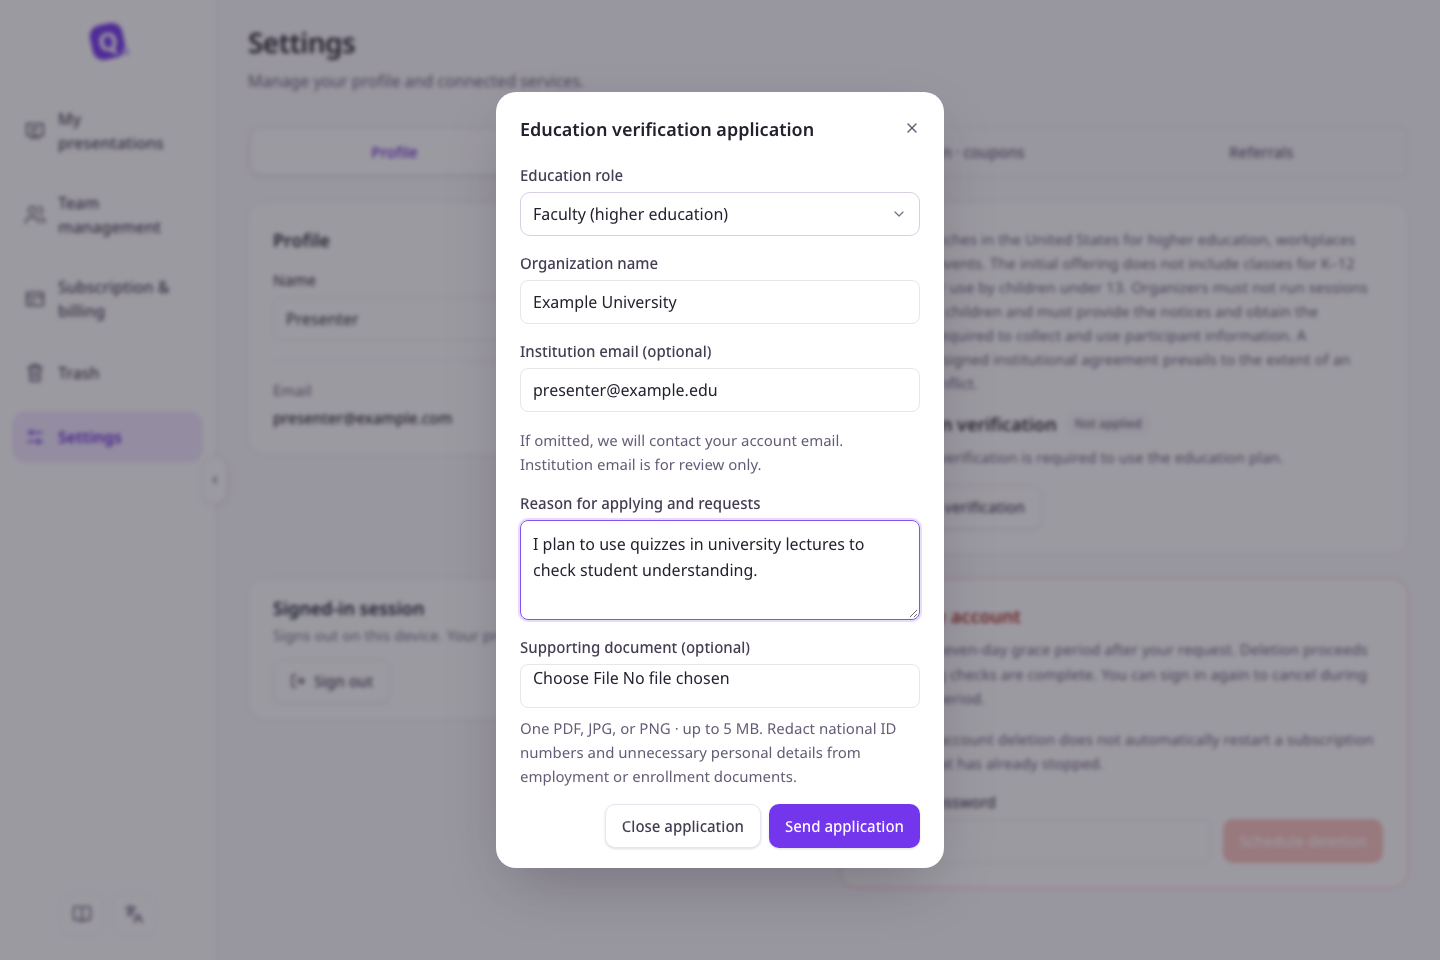
After signing in, go to Settings → Profile → Education verification → Request verification. Enter your Education role, Organization name (for example, Example University), and Reason for applying and requests. Describe your intended use and any requests, such as I plan to use quizzes in university lectures to check student understanding.
Institution email and Supporting document are optional. The institution email is used as a reference for review; if omitted, we will contact your account email. You can attach one PDF, JPG, or PNG up to 5 MB, such as proof of employment or enrollment. Redact national ID numbers and unnecessary personal information first. Attachments are private and can only be downloaded by you and reviewing administrators. Use Remove attachment to exclude a file from your submission.
Select Send application to submit for manual review. After success, the dialog closes and the card shows Under review with your submitted details. You cannot submit another application while a review is pending. Approval changes the status to Verified. If rejected, read the reason on the card, select Request verification, edit the details, and resubmit. Your existing attachment is kept unless you replace or remove it.
If an error appears, check your inputs and retry in the same dialog. For file errors, check the format and size. Close application or Escape preserves your draft while you stay on the current page. Closing is disabled during submission.
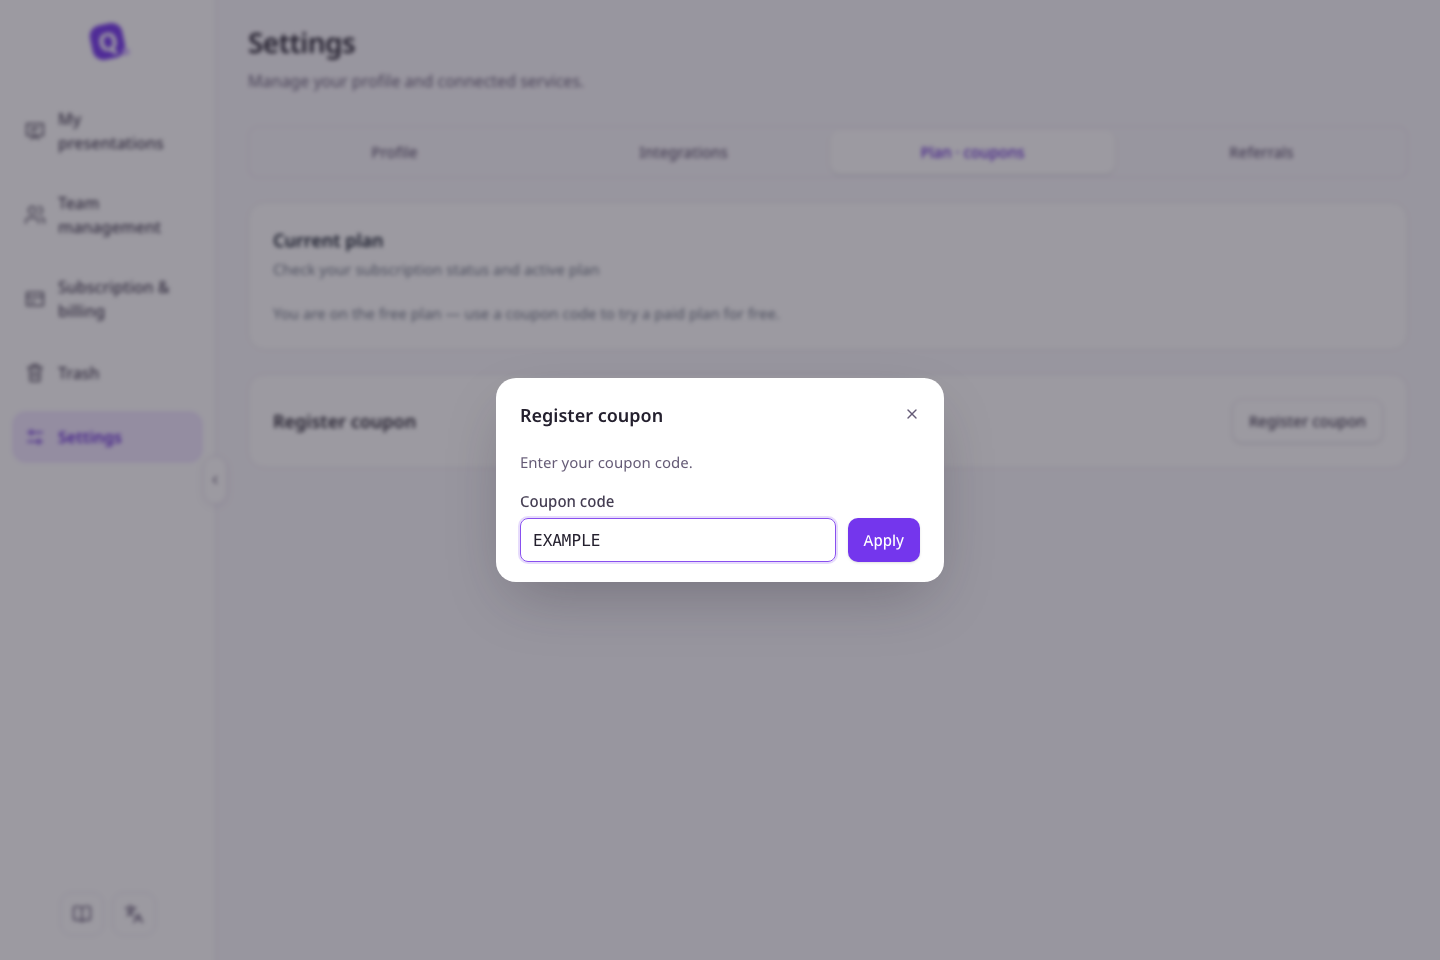
If you have a coupon, open Settings → Plan · coupons → Register coupon. Enter your issued code in Coupon code and select Apply. The EXAMPLE text in the screenshot is illustrative, not a usable code. Check the success message and updated plan or redemption history. If the request fails, check the code and retry; the input is retained. Codes are trimmed and converted to uppercase before submission. Editing and closing are disabled while submitting. Fixed-amount and percentage discount coupons are currently unsupported; registering a coupon does not promise a discount on the next payment.
Navigating subscription and billing
After signing in, open Subscription & billing from the workspace. Use Plan & usage to check your current plan and this month's participants, Passes & subscriptions to browse available products, and Purchases & passes to review purchased passes and recurring contracts. For example, select Purchases & passes to find a pass you already bought. A purple background and underline mark the current section, and the menu remains available across all three pages.
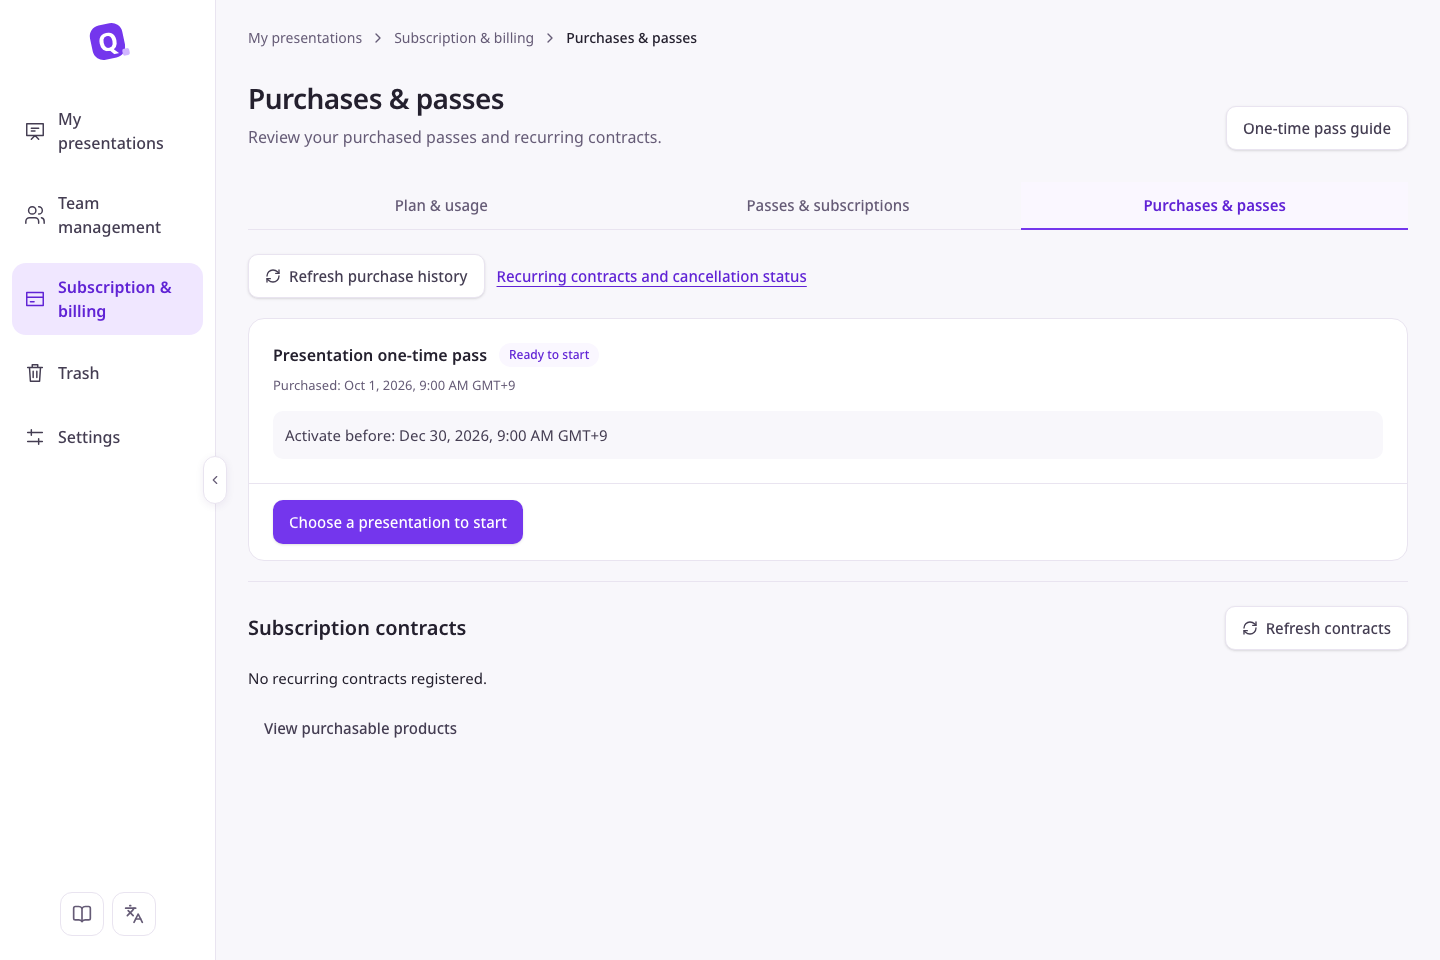
In purchase history, select Recurring contracts and cancellation status to jump to Subscription contracts. Navigating or viewing records does not purchase or cancel a subscription. If records fail to load, use the refresh or retry action shown with the guidance.
Prices appear in Korean won (₩) when the interface is in Korean and in US dollars ($) in other languages. If no product is on sale in that currency, the price is shown in the other currency that is on sale. All prices include tax; check the final amount in the checkout. KRW prices show a Monthly prices include VAT note, and USD prices show a Monthly prices in US dollars (USD) note. Times on order, purchase, and contract pages use the time zone of the device you are using and include the zone name, such as GMT+9 or EDT.
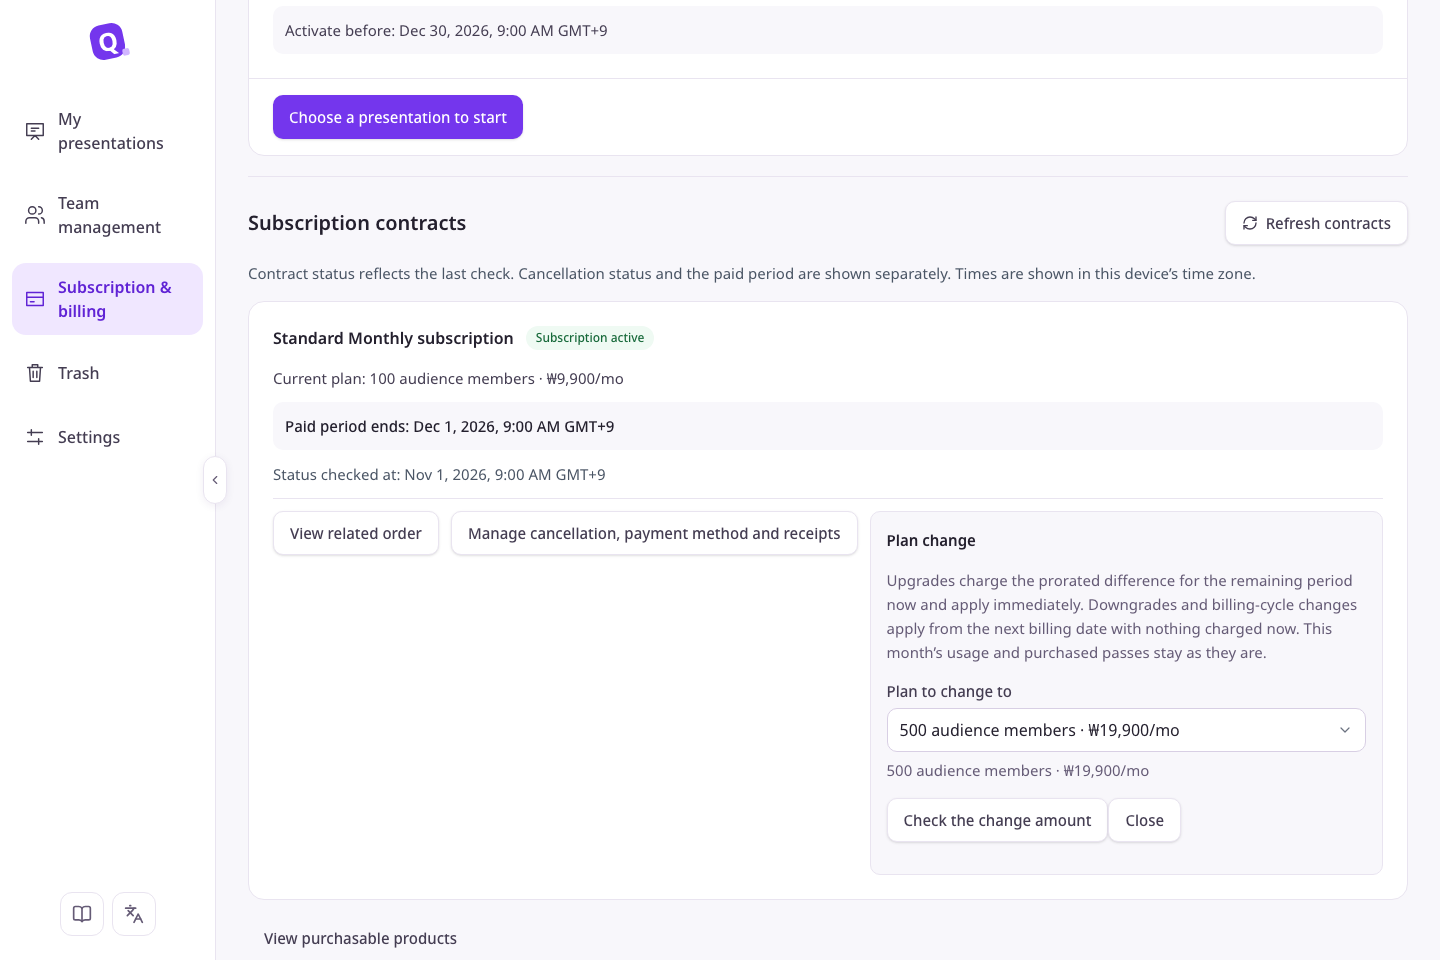
To change an existing subscription, open Purchases & passes → Subscription contracts → Plan change, choose a target plan (for example, 500 participants), and select Check the change amount. Having an existing subscription does not by itself prevent selecting a change, but products that do not meet eligibility or sale conditions remain unavailable. Review the amount and effective date, give consent, and confirm. Check for confirmation that the new plan has been applied or scheduled for the next payment date. If online plan changes are unavailable, contact support instead of confirming.
Clearing an order in progress
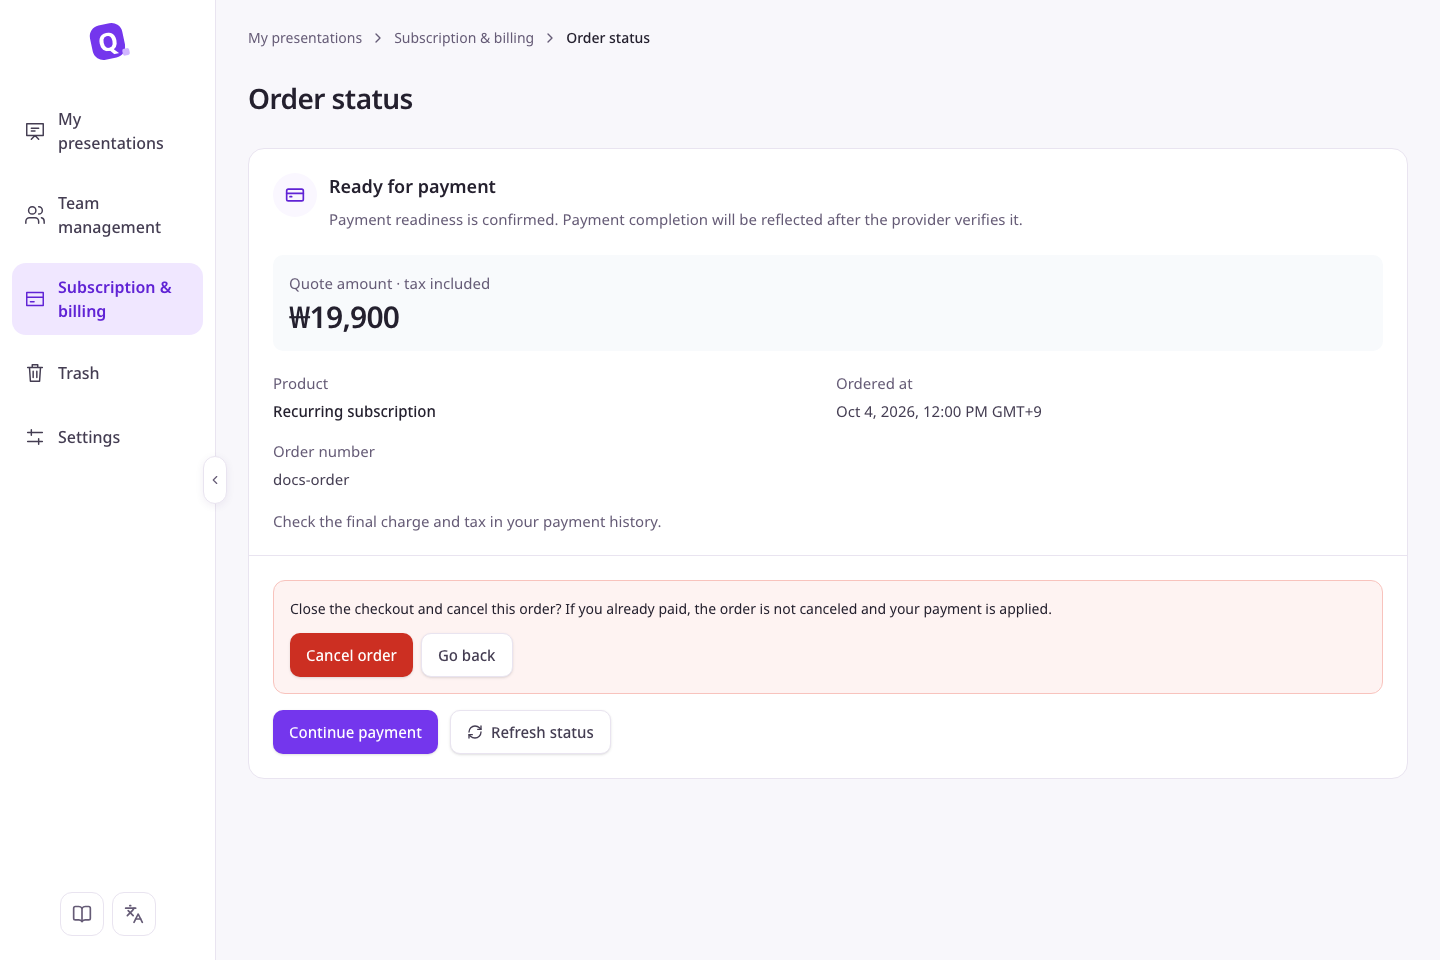
If you open the checkout and leave without paying, the order stays in progress. While an order is in progress, Passes & subscriptions shows You have an order in progress and you can't get a new quote.
- Select Check existing order in that notice (or Check order status in Plan & usage) to open the Order status page.
- If the status is Ready for payment, you can either pay or clear the order. To pay, select Continue payment.
- If you won't pay for this order, select Cancel this order. When the confirmation appears, select Cancel order, or Go back if you change your mind.
- You're done when the status changes to Order canceled with a note that you can order again. Go back to Passes & subscriptions to get a new quote.
If you simply leave the checkout open, the order closes on its own as Order expired once the checkout window (24 hours) passes, and you can order again. Automatic cleanup is applied after the payment provider confirms the checkout closed, so it can take a few more hours.
If you see We couldn’t cancel the order, a payment may be in progress or already complete. Select Refresh status to check. If the payment went through, the order is not canceled and appears in your purchases. Orders waiting on the provider, such as Awaiting payment or Checking payment status, can't be canceled; wait until the status changes.
Reviewing one-time pass conditions
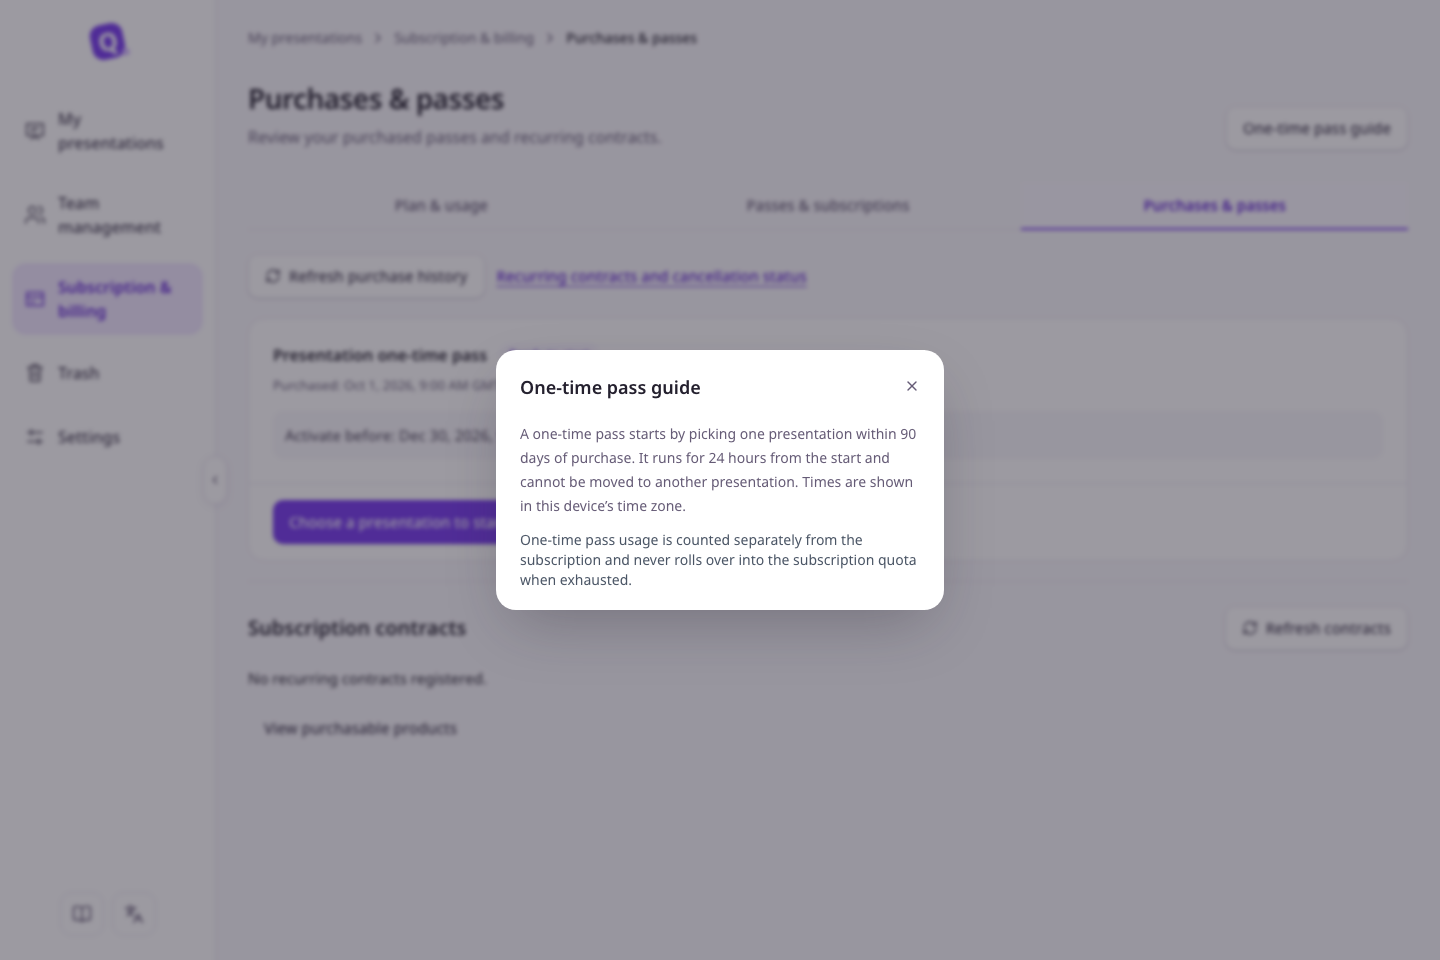
If you have a one-time pass purchase, open Subscription & billing → Purchases & passes and select One-time pass guide at the top. Review the activation deadline, duration and usage conditions, then close the dialog or press Escape. Opening the guide does not activate a pass. To activate it, use Choose a presentation to start on the purchase, choose a presentation and complete the separate confirmation. If purchases cannot load, use Refresh purchase history to try again.